Urine drainage bags are critical medical devices used to collect urine from individuals with impaired bladder function (e.g., due to catheters, neurological conditions, or post-surgical recovery). Proper emptying of these bags is not only essential for maintaining patient comfort and mobility but also for preventing urinary tract infections (UTIs), catheter-associated urinary tract infections (CAUTIs), and other healthcare-associated infections (HAIs)—which affect 15–25% of catheterized patients annually (per CDC data). This guide outlines evidence-based, step-by-step procedures for emptying urine drainage bags, along with safety precautions, cleaning protocols, and monitoring best practices—aligned with international standards (e.g., WHO Guidelines on Hand Hygiene in Health Care, CDC CAUTI Prevention Toolkit).
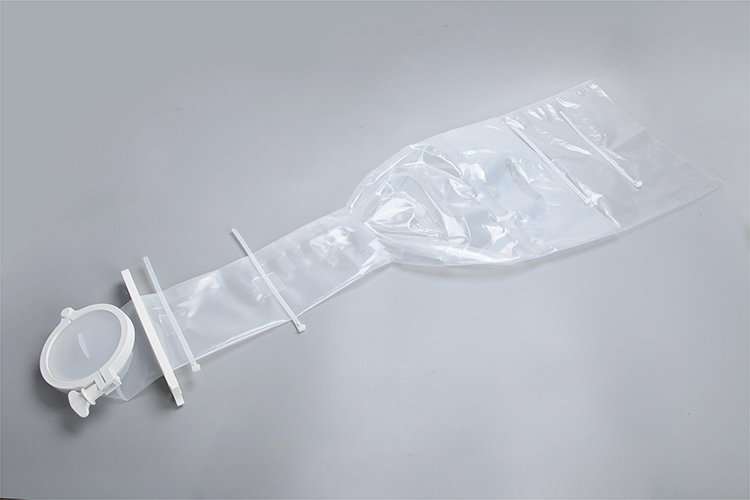
Before proceeding, it is important to distinguish between the two primary bag types, as their handling varies slightly based on design and use case:
| Bag Type | Key Characteristics | Typical Use Case |
|----------------|-------------------------------------------------------------------------------------|---------------------------------------------------------------------------------|
| Leg Bags | Small (500–1,000 mL capacity); lightweight; strapped to the thigh/calf; equipped with a short, flexible tube (15–30 cm) connecting to the catheter. | Ambulatory patients (e.g., those recovering from hip surgery) who require mobility during the day. |
| Bedside Bags | Large (2,000–4,000 mL capacity); designed to hang from bed rails, wheelchair handles, or IV poles; longer tubing (100–150 cm) for bedside use. | Bedridden patients (e.g., ICU patients, those with spinal cord injuries) or overnight use for all catheterized individuals. |
Both types require emptying when they reach 75% of their maximum capacity (e.g., 750 mL for a 1,000 mL leg bag) to avoid overfilling, which can cause:
- Increased pressure on the catheter, leading to urethral irritation or backflow of urine into the bladder (a major CAUTI risk).
- Bag rupture or leakage, compromising hygiene and patient dignity.
2. Pre-Procedure Preparation: Supplies & Safety Precautions
Proper preparation minimizes contamination risk and ensures efficiency. Gather the following supplies before starting the procedure:
| Supply Category | Specific Items | Purpose |
|-----------------------|--------------------------------------------------------------------------------|-------------------------------------------------------------------------|
| Personal Protective Equipment (PPE) | Disposable, powder-free exam gloves (latex or nitrile, per patient allergy status). | Prevents direct contact with urine (a potentially infectious bodily fluid) and protects both the caregiver and patient from cross-contamination. |
| Collection/Measurement Tools | Calibrated urinary measuring container (2,000 mL capacity, with volume markings in mL/oz); non-sterile basin (if measuring is not required). | Enables accurate documentation of urine output (critical for monitoring hydration, renal function, or fluid balance in hospitalized patients). |
| Disinfection Supplies | Alcohol-based disinfectant wipes (70% isopropyl alcohol) or chlorhexidine gluconate (CHG) wipes (for patients with alcohol sensitivity). | Disinfects the bag’s drainage spout to kill pathogens (e.g., E. coli, Klebsiella) that could enter the catheter system. |
| Waste Disposal | Lined trash bag (for used gloves, wipes, or contaminated materials). | Ensures proper disposal of biohazardous waste, complying with OSHA’s Bloodborne Pathogens Standard (29 CFR 1910.1030). |
| Hand Hygiene | Soap and running water, or alcohol-based hand rub (ABHR, ≥60% alcohol). | The single most effective way to prevent the spread of germs. |
3. Step-by-Step Procedure for Emptying Urine Drainage Bags
Follow these sequential steps to empty bags safely and aseptically (i.e., without introducing contaminants into the urinary tract):
Step 1: Perform Hand Hygiene
- If hands are visibly soiled: Wash with soap and running water for at least 20 seconds (rubbing all surfaces: palms, back of hands, fingers, between fingers, and under nails), then dry with a disposable paper towel.
- If hands are clean: Use an ABHR (apply 3–5 mL to palms, rub until dry—~20 seconds).
- Rationale: Hand hygiene reduces the risk of transferring skin flora (e.g., Staphylococcus aureus) to the bag or catheter.
Step 2: Don Disposable Gloves
- Put on one glove at a time, ensuring a snug fit. Avoid touching the outer (contaminated) surface of the glove with bare hands.
- Rationale: Gloves act as a barrier between the caregiver’s hands and urine, which may contain pathogens (e.g., CAUTI-causing bacteria).
Step 3: Position the Bag and Collection Container
- For leg bags: Assist the patient to a seated or standing position (if ambulatory). Hold the leg bag’s drainage spout over the toilet or measuring container, ensuring the spout is pointing downward (to leverage gravity).
- For bedside bags: Adjust the bag’s hanging height to ensure it is below the level of the patient’s bladder (typically 30–45 cm below the suprapubic area) but not touching the floor (floor contact transfers dirt and pathogens to the bag). Place the measuring container under the spout.
- Rationale: Maintaining the bag below bladder level prevents urine backflow (which can push bacteria into the bladder), while avoiding floor contact reduces contamination risk.
Step 4: Aseptically Open the Drainage Spout
- Locate the bag’s drainage valve (a twist-lock or flip-top spout). Use your gloved hand to open the valve—do not touch the inner surface of the spout or the valve opening (this area must remain as clean as possible).
- Critical Note: Never disconnect the bag from the catheter to empty it—disconnection breaks the “closed urinary drainage system,” a key CAUTI prevention measure (CDC recommends keeping the system closed unless absolutely necessary).
Step 5: Empty the Bag Completely
- Allow urine to flow freely into the collection container. Gently squeeze the bag (starting from the top) to ensure all urine is drained—residual urine can promote bacterial growth.
- If monitoring output: Once empty, place the measuring container on a flat surface and read the volume at eye level (to avoid parallax errors). Record the volume, color (e.g., pale yellow, amber), clarity (e.g., clear, cloudy), and any unusual odor in the patient’s medical record.
- Rationale: Complete emptying prevents stagnant urine (a breeding ground for bacteria), while output monitoring helps detect dehydration (low output: <0.5 mL/kg/hour) or renal dysfunction (sudden output drops).
Step 6: Disinfect the Drainage Spout
- Close the drainage valve tightly. Use an alcohol wipe to clean the outer surface of the spout, applying firm pressure and rubbing in a circular motion for 15 seconds (ensure the entire spout is covered).
- Allow the spout to air dry for 10–15 seconds (alcohol requires time to kill pathogens). Do not wipe the spout with a dry towel (this reintroduces contaminants).
- Rationale: Disinfection kills any pathogens that may have contacted the spout during emptying, preventing them from entering the bag during future use.
Step 7: Dispose of Waste and Remove Gloves
- Place used alcohol wipes in the lined trash bag.
- Remove gloves by peeling them off inside-out (to contain contaminants): Grasp the wrist of one glove, pull it down over the hand, then use the exposed clean inner surface to pull off the second glove. Dispose of gloves in the trash bag.
- Tie the trash bag securely and discard it in a designated biohazard waste bin (if in a healthcare facility) or regular trash (if at home, per local regulations).
Step 8: Perform Post-Procedure Hand Hygiene
- Repeat hand hygiene (soap and water or ABHR) to remove any residual glove powder or contaminants.
4. Post-Emptying Care: Cleaning and Maintenance
Emptying is only part of urinary drainage bag care—regular cleaning and monitoring are essential to prevent infections and extend device life:
A. Routine Bag Cleaning (for Reusable Bags)
Reusable bags (typically used for 7–14 days, per manufacturer guidelines) should be cleaned weekly or if urine odor is noticeable:
1. Prepare a cleaning solution: Mix 1 part white vinegar (5% acetic acid) with 3 parts warm water (or use a manufacturer-recommended urinary bag cleaner). Avoid bleach (it can degrade bag material and irritate the skin).
2. Fill the bag: Close the drainage valve, then pour the cleaning solution into the bag until it is ½ full.
3. Soak and agitate: Seal the bag’s top opening (if applicable), shake gently to distribute the solution, and let it soak for 20–30 minutes.
4. Rinse thoroughly: Empty the cleaning solution, then rinse the bag 3–4 times with warm tap water to remove vinegar residue (residue can irritate the urinary tract if left behind).
5. Air dry: Hang the bag upside down (with the drainage valve open) in a clean, well-ventilated area (away from toilets or sinks). Ensure it is completely dry before reuse (moisture promotes mold growth).
B. Ongoing Monitoring
- Check for leaks: Inspect the bag, tubing, and valve daily for cracks, tears, or loose connections. Replace the bag immediately if leaks are found (leaks expose the patient to skin irritation and increase infection risk).
- Assess tubing for kinks: Ensure the catheter tubing is free from bends or kinks—obstructed flow causes urine retention, which increases bladder pressure and CAUTI risk.
- Monitor for infection signs: Watch for CAUTI symptoms in the patient, including:
- Fever (temperature >38°C/100.4°F) or chills.
- Cloudy, foul-smelling, or blood-tinged urine.
- Suprapubic pain (lower abdominal discomfort) or dysuria (painful urination, if the patient can perceive it).
- Report any of these signs to a healthcare provider immediately.
C. Bag Replacement
- Follow manufacturer guidelines: Most disposable leg bags are replaced every 3–7 days; bedside bags every 7–14 days. Reusable bags may last 1–3 months (if well-maintained).
- Replace immediately if: The bag is damaged (leaks, tears), becomes heavily soiled, or if the patient develops a CAUTI (to prevent reinfection).
5. Key Contraindications and Safety Tips
- Never reuse gloves: Disposable gloves are for single-use only—reuse spreads pathogens.
- Avoid touching the catheter: Do not adjust or manipulate the catheter during bag emptying (this can dislodge the catheter or introduce contaminants).
- For bedridden patients: Use a bedpan or urinal if the patient cannot be positioned near a toilet—never empty the bag into a food container or non-medical vessel.
- Home care note: If caring for a loved one at home, store cleaning supplies (vinegar, wipes) away from children and pets. Wash the measuring container with soap and water after each use.